Week 10, Machine Design
This week assignment tasks are
a) To automate machine
b) To document the group project and individual contribution
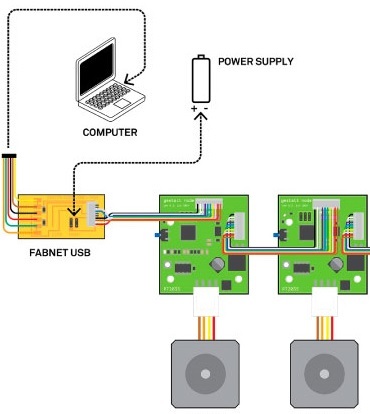
Layout the circuit
First thing first
First is to install Python 2.7 by selecting Windows X86-64 MSI Installer (2.7.0). Followed by installing pyserial-3.0.1.win32.exe (md5) into the laptop. Lastly is to install pip-8.1.1-py2.py3-none-any.whl (md5, pgp)
Tutorial on how to do the above installation can be followed up in these videos.
Python 2.7 and setting the system path.
pyserial
python pip
Generally the Python 2.7 is for you to do your programming, pyserial is for communication between the laptop to gestalt nodes via the usb FDTI through the Fabnet board. The python pip is for package management system used to install and manage software packages written in Python.
What's next?
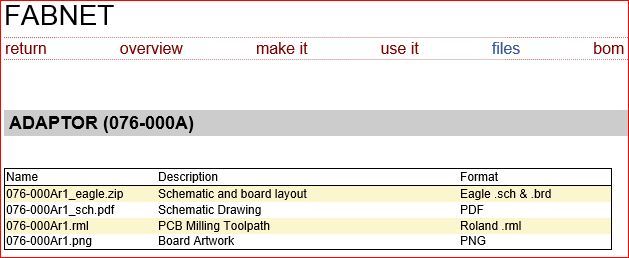
Fabnet Board
Unzip and open files 076-000a.brd and 076-000a.sch in EagleCAD.
Watch this video on how to convert 076-000a.brd into PCD GCode for milling.
This is what the board looked like after going through milling operation and components soldered on.
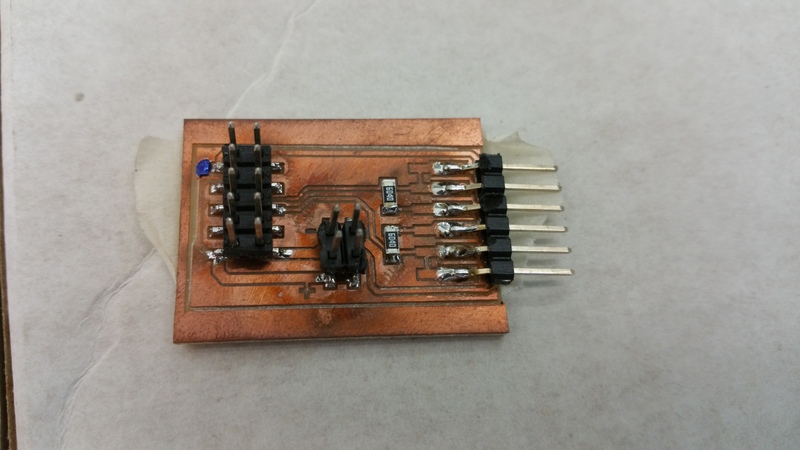
Completed Fabnet
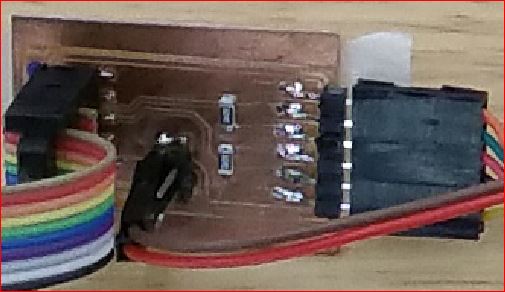
Fabnet in use
Gestalt up next.
After going through all these mumbo jumbo, we began hooking up circuitry to the stepper motor assembly.
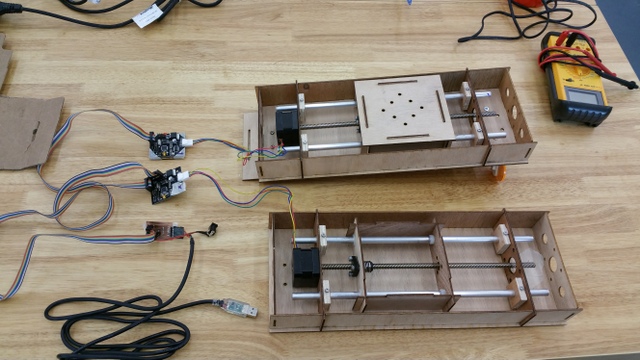
Hookup to module
Test run on a single axis module
Next unzip then copy all the files and save them in a new folder, named it gestalt-master.
Open the command prompt window, change directory and type in setup.py install as shown below.
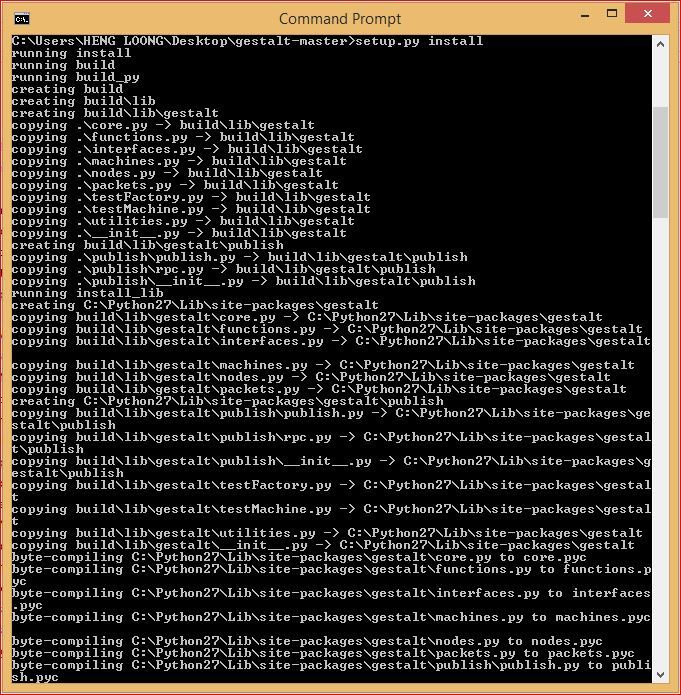
setup.py install
Open single_node.py in notepad and edit the command line number 25: interfaces.serialInterface(baudRate = 115200, interfaceType = 'ftdi', portName = '/dev/ttyUSB0'.
Ensure the portname is COM4 instead of ttyUSB0
Save the file and type,
C:\Users\HENG LOONG\Desktop\gestalt-master\examples\machines\htmaa\single_node.py in the command prompt to link up with a gestalt_node.
The result weren't successful but we still proceeded to open xy_plotter.py from gestalt-master folder.
Edit the command line number 25: interfaces.serialInterface(baudRate = 115200, interfaceType = 'ftdi', portName = '/dev/ttyUSB0'. in notepad.
Ensure the portname is COM4 instead of ttyUSB0
We realized that both python programs couldn't run in windows environment. We did some reading and found that the programs would performed in ubuntu enviroment. Our team leader Mark Ng has a Mac Book and decided to give it a go. Please visit this link to his web page.
The Results
Right click to Save Link As to download them.
hitme python program
our_mouse python program
xy_square python program
Finally the Modular XY axis in working order.
Now its time to shoot the bear.
Click on this link to my group web page.